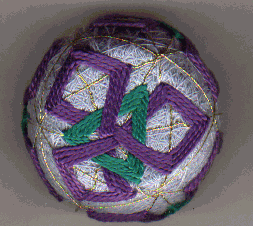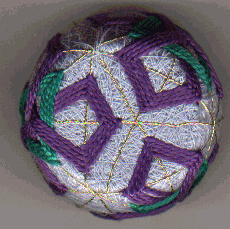


Stars N Garters Variation 3


Please follow the link at the bottom to try the original "Stars N Garters".

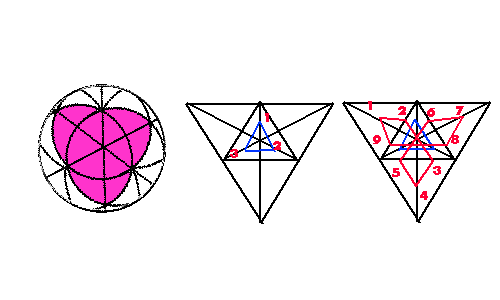
Start with a C-8.We'll be doing this design 4 times in the 4 big triangles on the ball. The pink area above is an example of one of these areas. To simplify the view, I use a triangle image instead of the ball image for the rest of the diagrams.
Start with doing a triangle 1/2 way to the edge of the inner triangle. (Make sure you count the number of repetitions.) Also, you won't be able to go to the edge, so only go around a few times.
For the next part be sure to weave in and out as before.
With a different color, start at the point 1/2 way from the edge of the inner triangle to the corner of the big triangle. Notice you again have a little + at the point where the little triangle edge meets the line
going to the center. You'll be working around that. So go to the point labeled
2 above. (It's 1/2 way to the edge of the triangle from the + center.) Then follow
around to #3 (notice the line you just made should parallel the edge of the triangle.) Following this around, you will find that you will be running low on room if you do it right.
Since you are working your way into the center, you don't have a lot of room to work with. Repeat the same number of times you did for the triangle.
Repeat a total of 4 times (one for each triangle).
In a very similar pattern to "Stars N Garters", you'll be weaving as you go around. Start at a line going diagonally down to the right of a diamond. Pick the point half way between the 6-line point and the edge of the diamond. From there go up (Notice the little image under the other 3? That's what we're doing.) to the line 2 lines away (go up about the same distance from the 6-line point as you just did. Then go down to the left (2 lines away) to complete a spear top.
Cross the diamond and go to the line on the bottom half of the diamond (that you used to turn while making the diamond.) Turn there and head back up. Repeat 4 times until you complete the round.
Next do the same pattern on the bottom. You can change colors (like I did), but make sure the total number of rounds is the same as you used for the diamonds.
As a side note, I have been using 2 colors on some of the backgrounds of the balls. I think it gives the balls more depth (besides being pretty). In this ball I used a blue and a beige color together. The third picture from the top of the page is the top of the ball. Since this is an obi design, there is nothing really there. Feel free to add something!
After doing the same number of repetitions as you did for the triangles, repeat on the bottom half. That's it. You're done!
